In addition to being an enthusiastic gardener, I love spending time in my kitchen to cook, bake, and prepare meals. And I almost always have these three basic vegetables readily available: onions, garlic, and leeks. The well-known chef James Beard, once said, “Without Alliums there would be food, but no cuisine.” I agree!
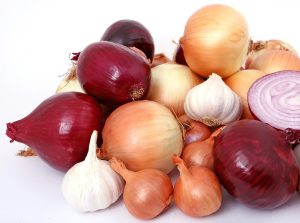
What’s an Allium? The genus Allium includes plants that are members of the Amaryllidaceae family. Most of these plants have bulbs (fleshy underground leaf layers) or horizontal rhizomes, and they include ornamentals, as well as food crops. This article focuses on three of those in the sub-family Allioideae: onions (Allium cepa), garlic (Allium sativum), and leeks (Allium ampeloprasum var. porrum). A common feature of these plants is their pervasive odor and distinctive taste, due to the sulfur compounds in their bulbs and leaves. Typically, onions have hollow, round leaves, whereas garlic and leeks have flat leaves.
Allium plants have perfect flowers, which means they have both male and female reproductive parts. However, they cannot self-pollinate, so they rely primarily on insects like bees, flies, and butterflies for successful pollination. Those pollinators are attracted to the globe-shaped flowers of Alliums that contain sweet, nutritious nectar. When they brush up against flowers and then move on to other flowers, pollen is transferred to begin the reproductive process.
Onions (Allium cepa): As a cultivated plant, onions have been traced as far back as 5000 BC to the Middle East (Iran, Iraq, Uzbekistan). Ancient Egyptians considered onions to be “sacred,” and they were used in burial rituals. Onions were also featured in tomb paintings. By the Middle Ages, onions were widely used in food and medicines across Europe. Columbus took onions to the New World in his 1492 voyage, and Native Americans soon began raising them as edible crops.
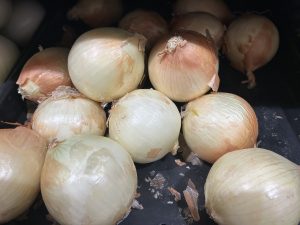
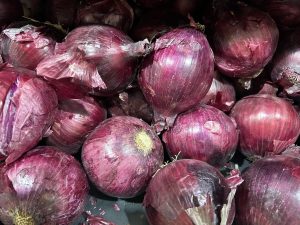
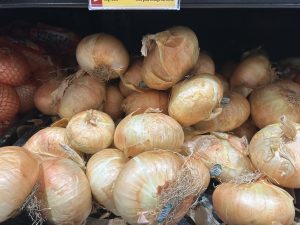
Common onions are divided into three groups defined by the length of daylight needed to grow and yield bulbs. This process is known as photoperiodic. Day light length is dependent on geographic location. Short-day onions need 11-12 hours of daylight and a mild climate. Intermediate-day types require 12-14 hours of daylight, and long-day onions need 14-16 hours of daylight. In general, short-day onions have higher water content, milder flavor, and more limited shelf life. Most sweet onions found in local supermarkets are short-day onions. Long-day onions tend to have hotter flavor and can be stored for extended periods of time. In the Mid-Atlantic region, intermediate types such as Candy, Super Star, Sweet Red, or Stockton Red Globe, are recommended for home gardeners who want to grow their own onions.
Growing Onions: For success cultivating onions, consider the site where you want to plant because they need full sun. For high-quality bulbs, begin with healthy soil that has pH of 6.2-6.5. Loamy or sandy soil is best, but you can amend clay soils by adding ample organic matter. If soil is loose and free of rocks or hard clumps, the bulbs will have sufficient space to thrive. TIP: Avoid planting onions in areas where brassicas have recently been grown; that may lead to poor development of the Alliums.
Onions can be grown from transplants (young, purchased seedlings), sets (small dormant bulbs from garden supply stores), or seeds (which must be fresh). In the mid-Atlantic, many gardeners start with onion sets or seedlings transplanted in the spring for a late summer harvest. Those methods are a bit easier and require fewer steps than planting from seed. Visit this site for detailed information about starting onions from seeds or refer to Suzanne Ashworth’s book “Seed to Seed” (in book references below).
Prior to planting, dig a shallow trench and poke small holes in the soil where seedlings or bulbs will go. For the transplant method, each plant should be positioned at the bottom of a hole, the same depth as it was in its original container. Plant seedlings 2-4 inches apart and water them well. For onion sets, be sure the weather is above 50 0 F on planting day. Bury the tiny bulbs one inch deep in the soil with tips pointed upward.
Onions are heavy feeders. To be sure they have sufficient nitrogen, phosphorus, and potassium, get a soil test. Then, based on the analysis from Virginia Cooperative Extension, follow nutrient management for onions for any soil amendments needed. By mid-summer discontinue feeding and cut off any seed heads that may appear. Keep the growing onions well-watered (one inch per week), especially during dry spells. When the leaf tips turn yellow, stop watering. Don’t mulch or hill up soil around your growing onions but remain vigilant about weeding and carefully remove any weeds that might compete with young Alliums.
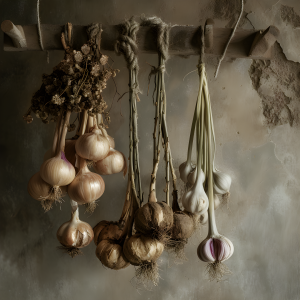
Harvesting Onions: When three-fourths of the tops of onion stalks fall over, it’s time to pull up the bulbs. For ease of harvest, you may want to use a sharp knife to cut bulbs from their roots underground, rather than grabbing and pulling hard on the stalks. Do not separate bulbs and stalks but set the entire plant on screens or some other elevated rack to dry in a warm location with good air circulation. Later, when the green necks of onions fade and thin out, you can trim off the long tops. For storage, use breathable mesh-type bags and avoid humid basements or refrigerators. Now you are ready to use onions from your stash in various recipes.
Alas, for many of us, chopping onions evokes tears. That’s because cutting an onion breaks down its cell walls, which then releases enzymes that mix with sulfur to make a gas. When that gas reaches the moisture in our eyes, an acid is formed, and tears then attempt to wash it away. Run cold water, turn on a fan, or wear onion goggles to reduce tearing when preparing onions.
Garlic (Allium sativum): Thanks to my Italian roots, garlic is an essential ingredient in dozens of my favorite dishes. Plus, garlic has legendary history for various culinary and medicinal purposes. The intensity of both its odor and taste tends to create strong reactions to this Allium, but there’s no denying that garlic enhances flavors when included in sauces, soups, stews, and marinated meats.
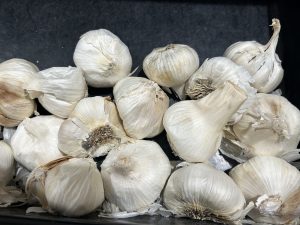
Growing Garlic: Three cheers for how easy it is to grow garlic! There are two main groups of garlic based on the type of central stem. Hardneck (top-setting garlic) or Allium sativum var. ophioscorodon has a hard, woody stem and a single circle of easy-to-peel cloves surrounding that stem. It’s fairly cold-hardy and has robust flavor. Softneck (braiding garlic) or Allium sativum var. sativum has no central stem and a large head containing hard-to-peel cloves with tiny cloves in the center. That’s the kind typically sold in grocery stores, but don’t plant cloves from store-bought garlic; they can harbor disease and may have been treated with an anti-sprouting chemical.
In the Mid-Atlantic, garlic is traditionally planted in the fall (mid-October to early November, before a hard freeze). This allows sufficient time for roots to get well-established before winter sets in. Garlic needs about two months of cold temperatures (32-50° F) in order for bulbs to develop. Like onions, garlic does well in full sun and prefers neutral, loose soil with pH 6.2-6.5 that’s rich in organic matter. Dig an 8-foot trench to plant garlic and water the soil the day before planting.
Like other Alliums, garlic will develop best if the growing medium has the appropriate amount of necessary nutrients, so refer to recommendations from your soil test (as noted above). If amendments are suggested, place that material in the trench and cover with soil before adding garlic bulbs. Take the outer layer of skin off each bulb and then separate individual cloves from the flat base where roots form, but don’t remove the thin covering on the cloves.
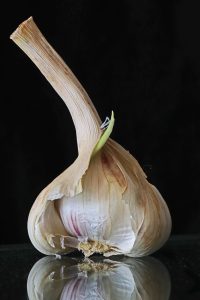
Plant each clove 2 inches deep and 4 inches apart and be sure they are pointed side up. Water well and continue to keep soil moisture consistent as the garlic grows. Avoid deep mulching around garlic (light straw is fine), but keep the bed weed-free, if possible. When you see garlic scapes form (long green curly shoots with a bulge at the end of the stalk) in early summer, cut those off, so the plant can concentrate on forming high-quality bulbs. You don’t want flower buds to develop!
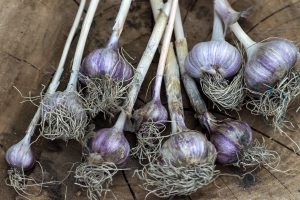
Harvesting Garlic: Be observant and reduce watering when the bottom third of the garlic leaves begin to fade and turn brown in early to mid-July. That’s the right time to harvest your garlic, before the plant is all dried out. TIP: During dry weather, water the garlic bed the day before harvest for ease of removing bulbs from the ground. Let the plants dry in the shade outside and later move them inside to a dry, well-ventilated location. To store garlic, do not rinse and keep it in a cool, dry location. Avoid trimming roots or stalks until at least one month after harvesting. Be careful not to damage the individual bulbs, which could lead to decay. Let the garlic cure for a couple of months and then cut back the stems. Enjoy using your tasty garlic when preparing scrumptious meals.
Leeks (Allium ampeloprasum var. porrum): The botanical name Allium ampeloprasum var. porrum indicates that these leeks are in the Porrum Group of the Allium ampeloprasum species. They hail from North Africa, where dried specimens were discovered in ancient Egypt, and Southern Europe. Later, these leeks spread to the British Isles and are a favorite in the Welsh diet today.
Porrum Group leeks are biennial plants typically grown as annuals in vegetable gardens in the United States. In contrast to onions and garlic with underground bulbs, the edible part of a leek plant is the elongated white stalk with green leaves that grow up to 10 inches above the soil surface. This cylindrical stalk has a slightly sweet oniony flavor and delicate buttery texture, making leeks a versatile accompaniment for many culinary specialties. For cooking, the stalks are usually cut into thin cross-section slices.
Growing Leeks: Growing requirements for leeks are slightly different from onions and garlic, but like their Allium relatives, they need well-drained, organically rich, loamy soil (pH 6.2-6.8) with consistent moisture and full sun exposure. Purchase leek seedlings at least 3 weeks before the last spring frost date. Refer to your soil test results to determine whether any soil amendments are needed. To plant leeks, make holes that are 6-8 inches deep and 6 inches apart in rows or a trench in your garden. Drop one seedling into each hole. Loosely mound soil around the bottom part of each seedling to prevent sunlight, which leads to the development of a lovely, tender, pearly-white shank.
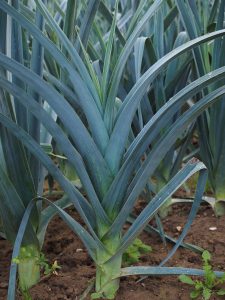
Alternatively, you can start leeks from seed indoors 8-10 weeks before the last frost date, or with direct seed sowing in your garden 3 weeks before the last frost date in the spring. Dig a 6-inch furrow in the soil and plant seeds ¼ inch deep. After seedlings emerge, thin these out, so they are 4-6 inches apart. A few weeks later, form loosely mounded soil around the base of each leek. Be sure they get adequate water, about one inch per week, and apply water at the root zone (not the leaves). Avoid mulching leeks during the growing process but keep them weed-free as much as possible.
Note: Leeks can be toxic to dogs and cats, so be sure to keep your household pets away from those plants.
Harvesting Leeks: Depending on the type of leek you plant, some can be harvested after 75-90 days. Leeks can also stay in the ground until after the first autumn frost, since cooler temperatures lead to sweeter taste. When weather gets colder, put loose straw over leek beds and consider adding a cold frame to prevent freezing. They can be harvested through the winter (if ground is not frozen) or the following spring before they go to seed. When ready to dig them up, loosen the plant with a digging fork, hold it at the base, and gently rock the leek back and forth until it comes upward.
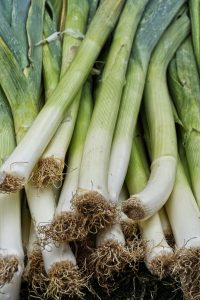
Keep unwashed, untrimmed, whole leeks in a cool location until ready to use. Just before cooking, wash and cut them. If necessary, split and rinse leeks to free any soil stuck between the leafy layers. You will be rewarded with delicious flavors and textures when you try recipes that include leeks!
Nutritional Value of Alliums: Beyond their culinary value, Alliums such as onions, garlic, and leeks are known to have positive effects on human health, due to the vitamins and essential minerals they contain. Pharmacological studies indicate that their bioactive compounds (e.g., flavonoids, polysaccharides, phenolic acids) have antioxidant, antimicrobial, anti-inflammatory, and anticancer properties. Alliums are also rich in macronutrients and micronutrients. They provide ascorbic acid (Vitamin C), Vitamin B6, potassium, calcium, magnesium, and manganese, which can impact our physiological health in beneficial ways. However, some people may have digestive sensitivities to Alliums, so consult with a medical professional as needed for guidance regarding consumption of onions, garlic, and leeks.
Diseases and Pests: Alliums are relatively trouble-free but are subject to a few garden pests and diseases. Good maintenance practices can help manage these issues in a vegetable garden.
- Allium leafminer: Larvae of this invasive fly tunnel into leaves and stems, which causes distorted growth and rotten spots. Use row covers in early spring and fall to prevent adult flies from laying eggs.
- Aphids: These small insects gather at the bottom of stalks and leaves. Use row covers or spray them with a blast of water from a hose.
- Japanese beetles and beetle larvae: They eat leaves and can cause significant damage. Use row covers to keep them away from garden plants or hand-pick them off Alliums.
- Cutworms: Green or brown caterpillars that come out after dark to eat seedlings. Use row covers or place cutworm collars around young plants at ground level (cardboard tubes from toilet paper or paper towel rolls, cut into 2-inch sections).
- Onion maggots: These small white creatures that live in the soil will eat roots of onion plants. Rotate crops to avoid this problem.
- Thrips: These small, thin, silver-colored insects climb up stalks and damage the plant tissue.
- Slugs and snails: Look for irregular holes and slime trails in the morning (these creatures come out at night). Hand-pick them off garden plants and around Allium.
- Fusarium basal rot: Look for yellowing leaves and dark brown or pinkish roots, which may indicate this fungus. Cut a bulb in half to see if it is turning brown at its base. Sanitize your tools, rotate your crops, and sanitize or solarize your soil to avoid development of this fungal infection.
- White rot or mold: Notice leaves that are wilting or turning yellow with white mold at the base of a bulb. Sanitize your tools, rotate your crops, manage water in the garden, and sanitize or solarize your soil.
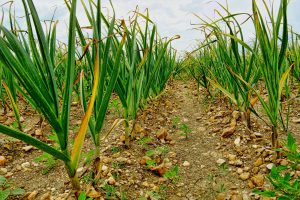
Natural Repellents: The pungency and powerful odor and taste of onions, garlic, and leeks offer an added bonus: they are natural repellents of wildlife that like to visit ornamental and vegetable gardens. The strong smell of Alliums is a natural defensive mechanism that can keep those hungry predators away. Place them on the periphery of your gardens to send a clear signal to those marauders: “Stay out!”
Online Resources
Allium ampeloprasum (Porrum Group) – Plant Finder
How to grow garlic by Cleve Campbell, Garden Shed, October 2022
How to Grow Onions From Seed (Best Tips & Tricks)
Growing Guide: Onions – SeedSavers
Allium Vegetables: Their Health Benefits and Nutrition
Healthcare effects of Allium vegetables
Books
Ashworth, Suzanne. Seed to Seed. (2002)
Damrosch, Barbara. A Life in the Garden (2024)
Damrosch, Barbara. The Garden Primer. (2008)
Deardorff, David & Wadsworth, Kathryn. What’s Wrong with my Vegetable Garden? (2011)
Matus, Matt. Mastering the Art of Vegetable Gardening. (2018)
Wallace, Ira. Grow Great Vegetables in Virginia. (2020)